A while back I needed a project. We are in a country with lots of beautiful wood. I needed something small and easy to make as I had zero tools.
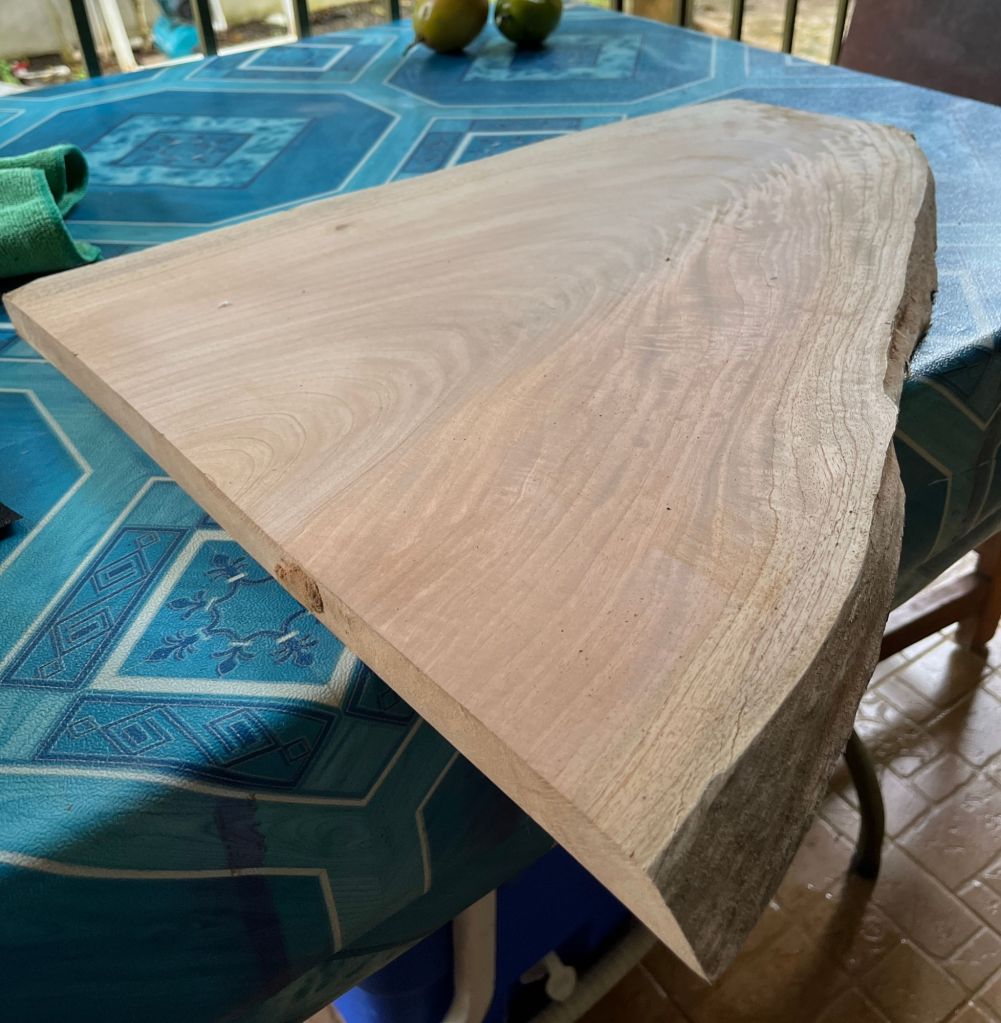
Daryl and I stopped by a lumber yard to see what was available. The workers were more than helpful and we were given two end pieces of wood.
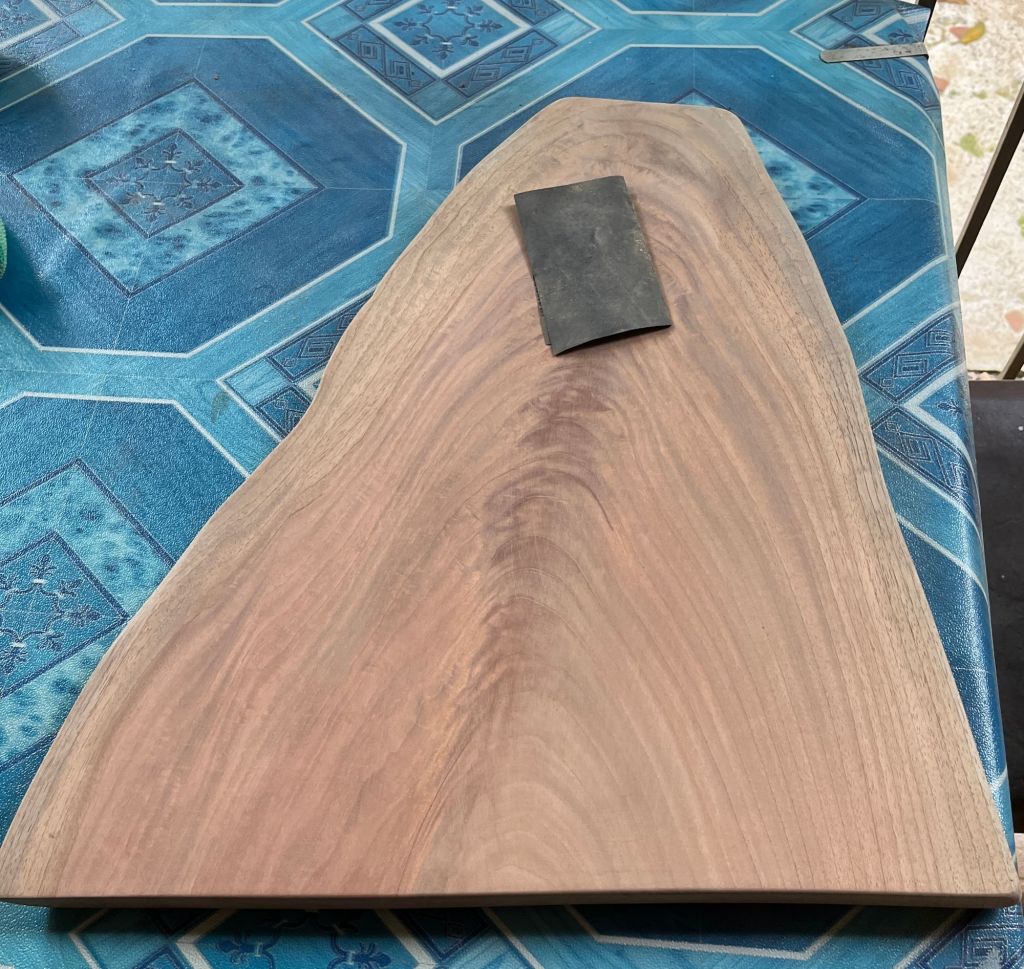

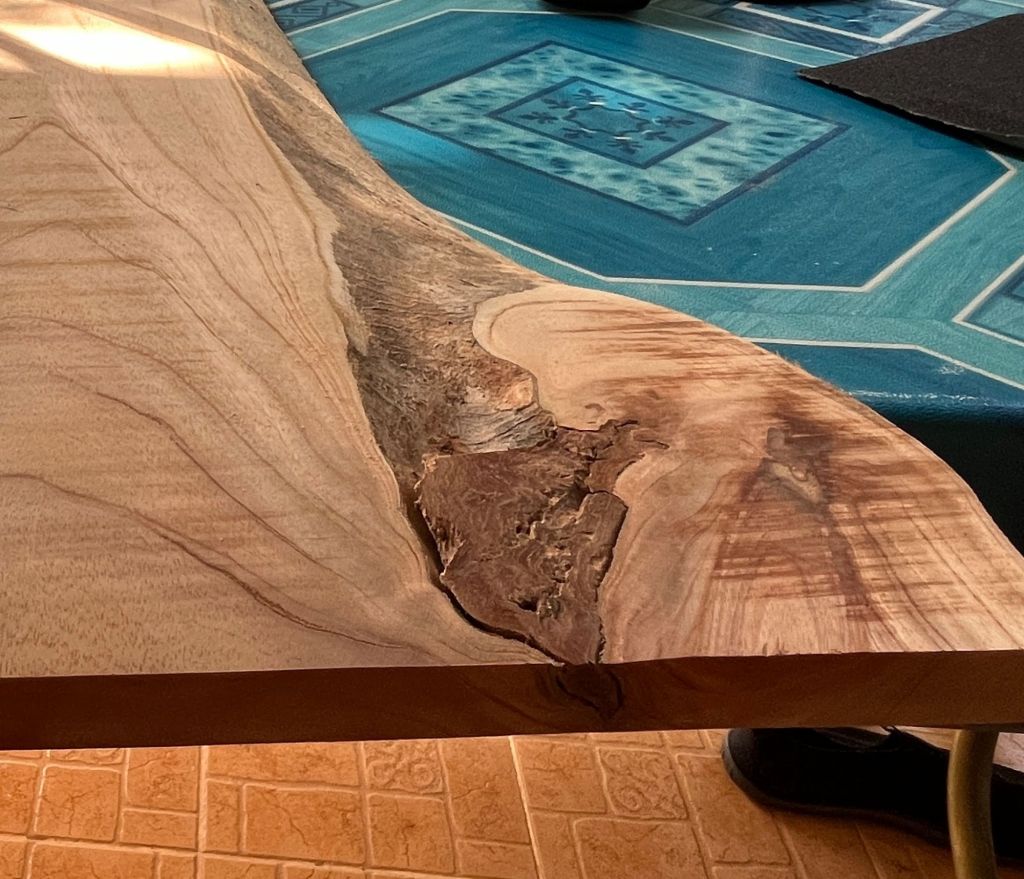
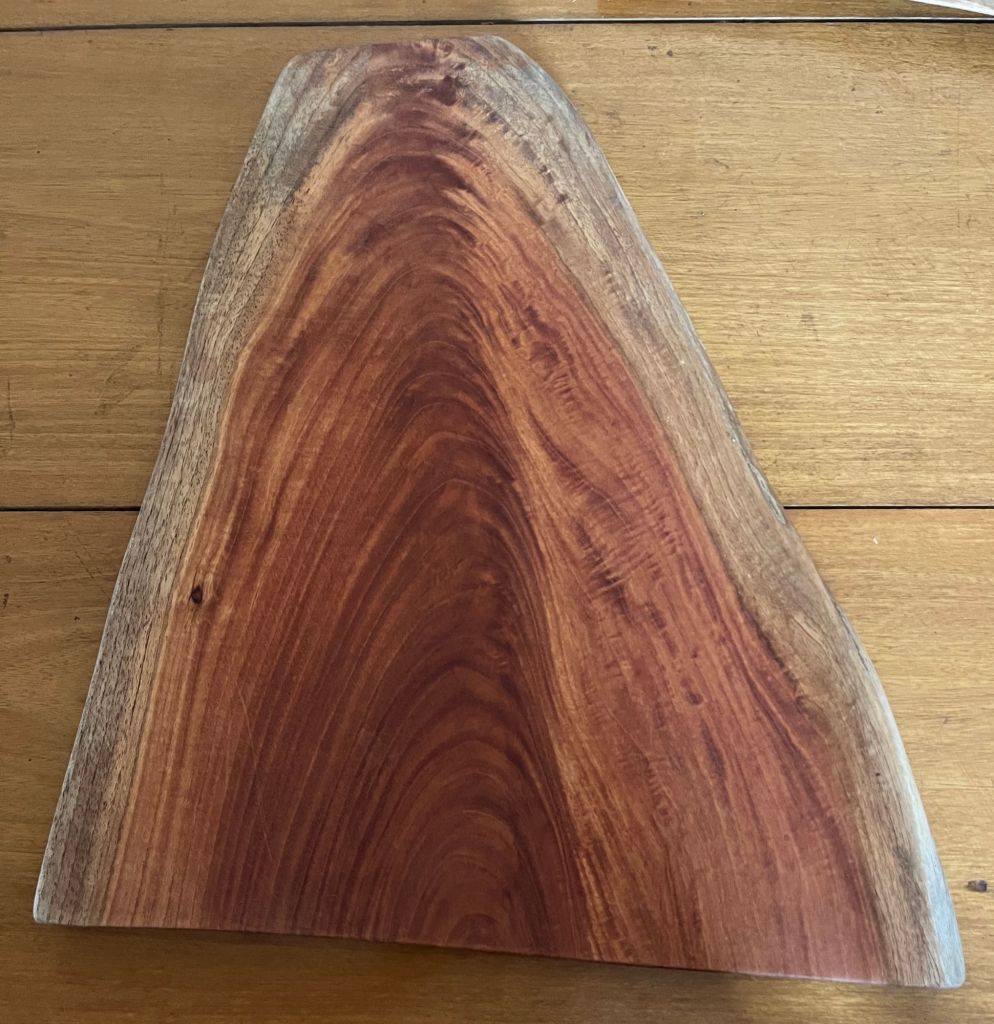
Both pieces were in fairly good shape, just rough edges, some saw marks and one had a big burl in it. With a bunch of sandpaper and a knife (to get rid of the bark and clean out the hole) I went to work.
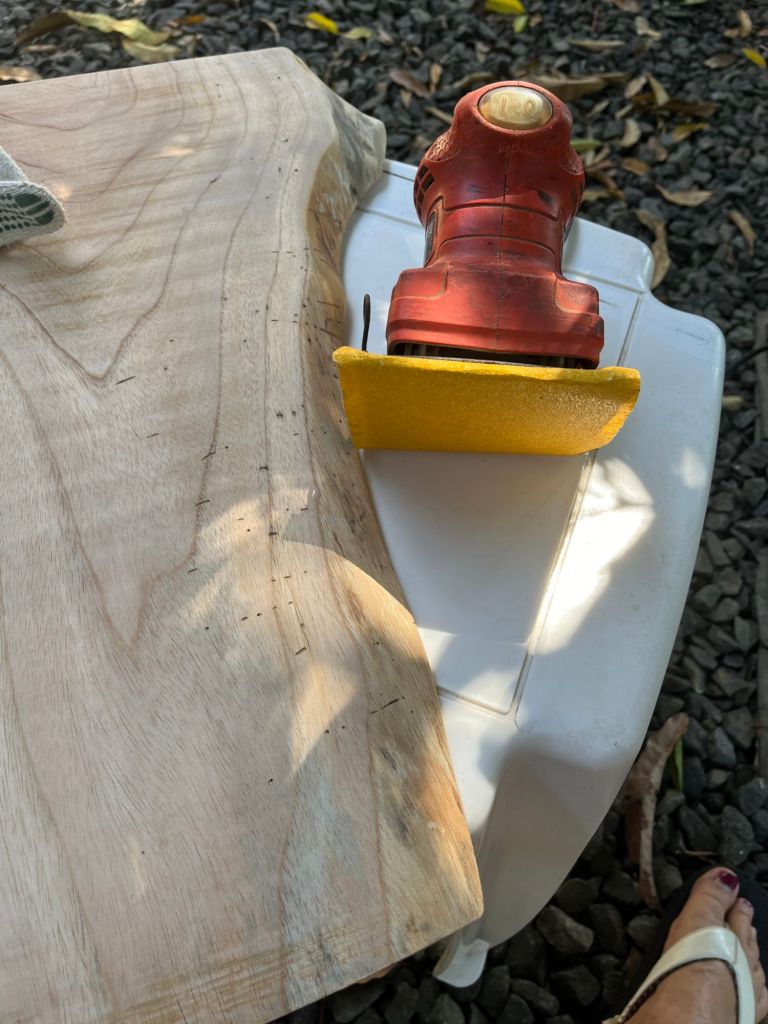
I started with a rough sandpaper, #80, then #120, then #220 to get smooth wood.

At some point in the many hours spent sanding, our landlord took pity and loaned me a small palm sander.
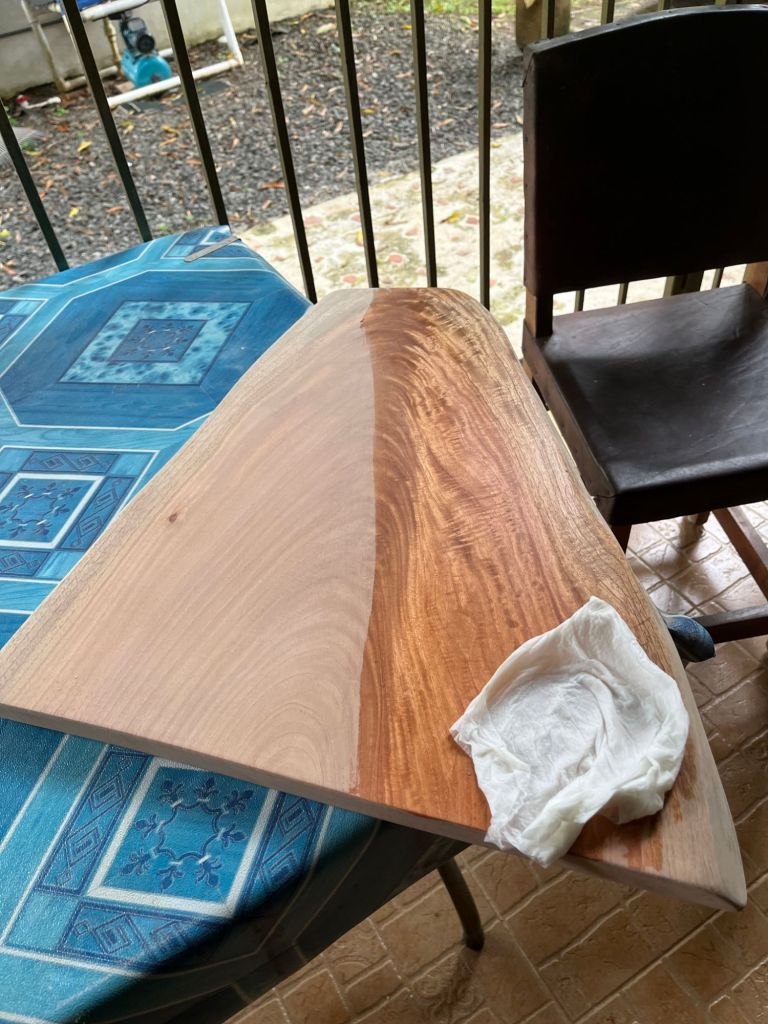
Once the sanding was completed it was time to wet the wood, as apparently this helps the little ‘hairs’ stand up and when sanded off make for a silky smooth finish. When the wood was wet you could really see the grain.
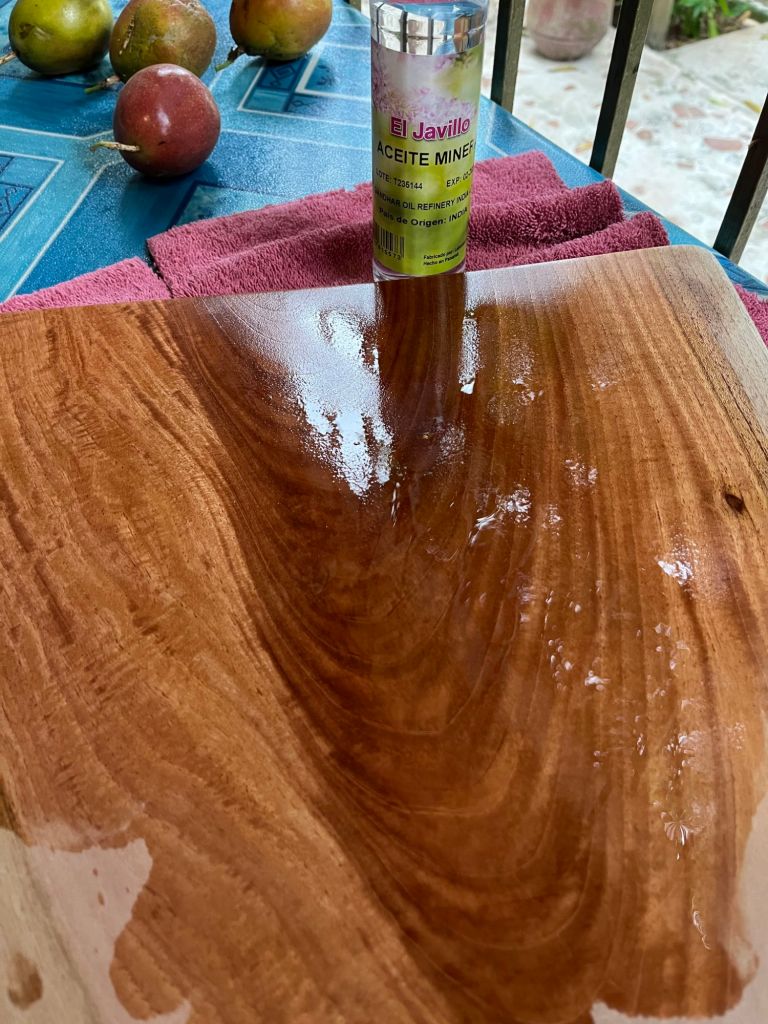
The last step was oiling. According to google it needed to be somethong like mineral oil as the boards were going to be used for food. We ended up going to the next town to a bigger pharmacy to find what we needed.
As an aside, see the maracuya ripening on the table. They are a wonderful flavour for kombucha.
Three coats of oil and we have a finished project.
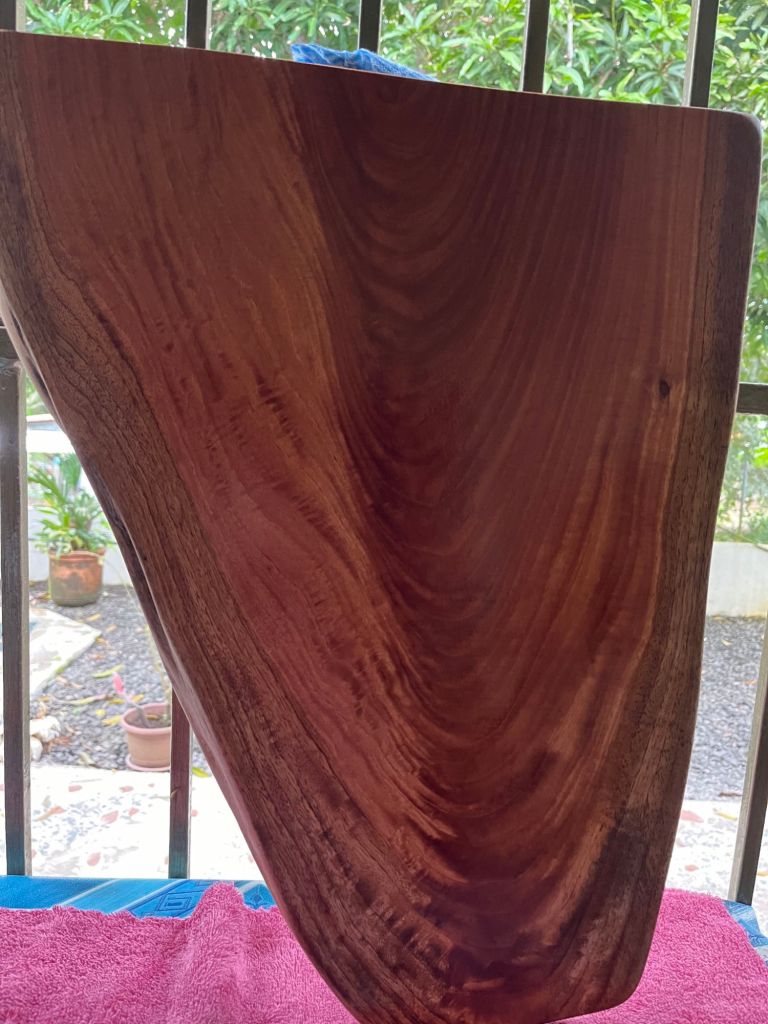
I have no idea what kind of wood this is, however the end product turned into usable boards, either for charcuterie, a cutting board or a trivet.
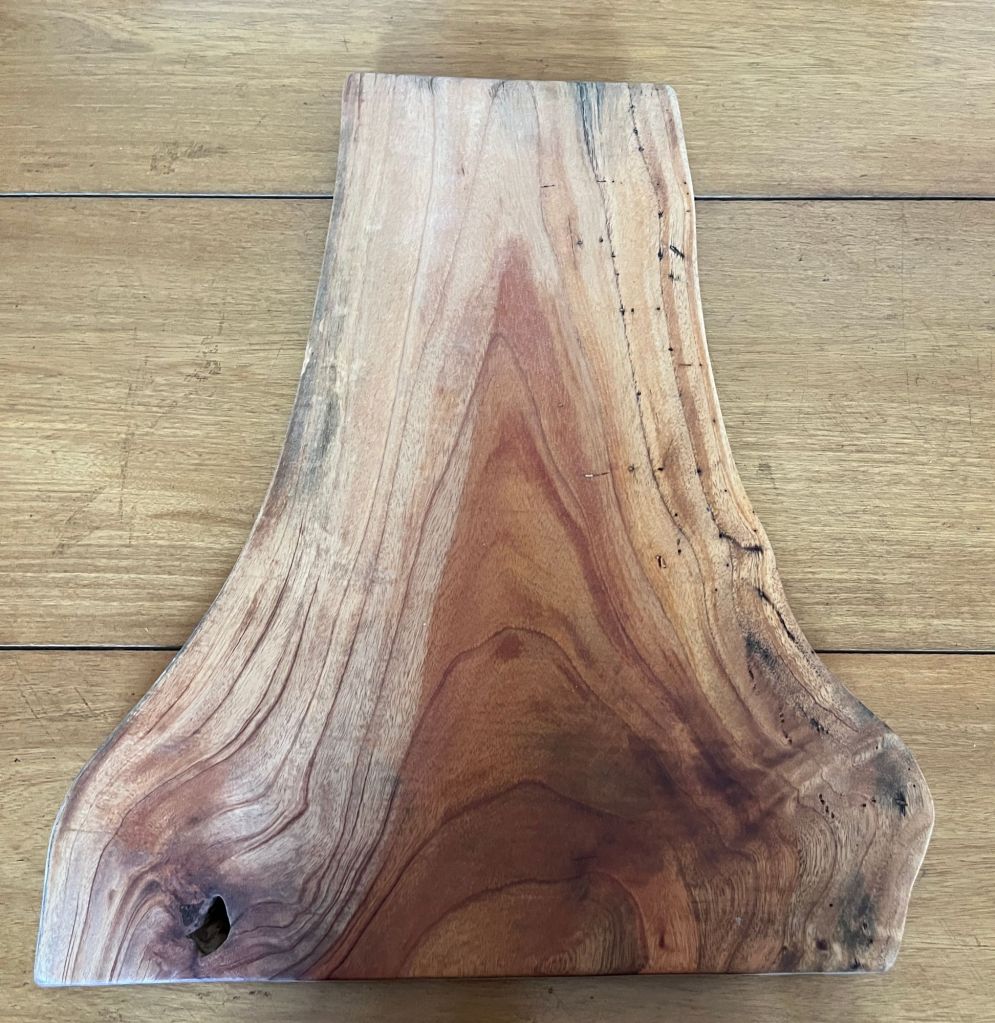
It has been a couple of months since those two pieces were completed. The colour has really toned down, but they get used constantly.
There is a good chance I might have found a new calling!!
Cheers
Ruth

Good work! Too bad you’ll have to leave your projects behind (I assume)
<
div>Linda
Sent from my iPad
<
div dir=”ltr”>
<
blockquote type=”cite”>
LikeLike
How are your hands?
Next project is to build a shelter for all your stuff 🏚️
LikeLiked by 1 person
what are you plans for the wood.
LikeLiked by 1 person